Blog

  • Why Is My RV Battery Dying Overnight?

    Why Is My RV Battery Dying Overnight?

    Why Is My RV Battery Dying Overnight?

    You shut everything down for the night, go to bed with battery power, and wake up to an RV battery that’s nearly dead. It can feel like the battery somehow drained itself while you were sleeping, but electricity went somewhere. The trick is figuring out whether your camper is quietly using more power than you realize, the battery isn’t holding the charge it should, or it never started the night fully charged in the first place.

    An RV battery dying overnight is usually a sign of excessive 12-volt power consumption, an unexpected parasitic draw, inadequate battery capacity, a weak battery, or a charging problem that left the battery less than fully charged before nighttime. In some cases, the RV is actually operating normally and the overnight loads are simply larger than the battery bank can support.

    Before buying another battery, I’d narrow down which of those situations you’re dealing with.

    Pin

    First Figure Out How Fast the Battery Is Actually Dying

    “Dead overnight” can mean very different things.

    One owner may have a fully charged battery at sunset that is severely discharged the following morning.

    Another may notice the battery monitor drop substantially overnight and assume something is wrong.

    Someone else may disconnect from shore power without realizing the battery wasn’t properly charged beforehand.

    Those situations shouldn’t be diagnosed the same way.

    Start with what you know about the battery before the overnight period.

    Was it actually fully charged?

    Had the RV been connected to shore power long enough for its charging system to replenish the battery?

    Had you been camping without hookups for several days already?

    Were you running the furnace?

    Was an inverter left on?

    Are you relying on one relatively small house battery or a much larger battery bank?

    Battery capacity and electrical demand have to be considered together.

    If you’re still getting familiar with the relationship between your batteries, converter, shore power and the rest of the camper, our guide to how the major systems in an RV work together gives you the bigger picture.

    Your RV Probably Isn’t Completely “Off”

    This catches a lot of owners.

    You can turn off the lights, television, water pump and other obvious equipment and still have 12-volt loads drawing power.

    RVs often contain equipment that needs a small amount of electricity continuously or remains connected unless it is specifically disconnected.

    Depending on your particular RV, possible loads can include detectors, control modules, radio memory, monitoring equipment, leveling controls and other electronics.

    One tiny load isn’t necessarily enough to kill a healthy, adequately sized battery overnight.

    Several loads combined with an already partially discharged or weak battery are another story.

    That’s why the goal isn’t to panic when you discover that your camper uses some power while “off.” The goal is to determine whether the amount of power being consumed makes sense.

    The Furnace Can Use More Battery Power Than You Expect

    If this problem happens mainly on cold nights, your furnace jumps much higher on my list.

    A propane RV furnace doesn’t operate on propane alone.

    The propane creates heat, but the furnace blower and electrical controls need 12-volt power. If temperatures are low enough that the furnace cycles repeatedly throughout the night, that blower can put a meaningful load on the house battery.

    This creates a situation that confuses people all the time.

    You go to sleep thinking:

    “My furnace is running on propane.”

    Technically, yes, propane is providing the heat.

    But your battery is helping make that heat possible.

    The colder the night, the more frequently the furnace may operate. A small battery bank that seems adequate during warm-weather camping can suddenly struggle when the furnace starts running for hours every night.

    If your battery problem appeared at roughly the same time you started using the furnace heavily, don’t ignore that connection.

    An Inverter Can Quietly Add to the Drain

    If your RV has an inverter, check whether it’s being left on.

    An inverter takes DC electricity from the battery bank and makes AC electricity available to whatever circuits or equipment the system is designed to supply.

    The important part here is that an inverter itself can consume some power while operating, even before considering the AC equipment you’re asking it to run.

    Then there are the loads on the other side of it.

    Something plugged into an AC outlet may continue consuming electricity even when it doesn’t look particularly active.

    Chargers, televisions, entertainment equipment and other electronics can all contribute.

    If you’re trying to maximize battery life while dry camping, don’t assume “nothing important is running” means the inverter system isn’t using electricity.

    Your Refrigerator May Still Need 12-Volt Power

    Another common misconception is that switching an RV refrigerator to propane completely removes it from the electrical system.

    That isn’t necessarily true.

    Many RV appliances that use propane still depend on 12-volt electricity for their controls.

    The same general principle applies to some water heaters and other equipment.

    These loads may not individually explain a dramatic overnight discharge, but they become part of the total energy budget.

    That’s why looking for one mysterious device pulling every amp isn’t always the right approach.

    Sometimes the answer is simply that six or seven legitimate loads are operating at the same time.

    Don’t Forget Tank Heaters and Other Easy-to-Miss Equipment

    Some RV equipment is especially easy to overlook because you don’t constantly interact with it.

    Tank heaters are a good example.

    Depending on your camper, you may also have antenna equipment, control panels, electronic modules or accessories that continue consuming 12-volt power.

    After you’ve checked the obvious equipment, physically walk through the RV and look at every switch and control panel.

    Don’t rely on memory.

    It’s surprisingly easy to leave something operating because it doesn’t make noise or produce an obvious visual clue.

    Your Battery Disconnect May Not Disconnect Everything

    This one can be particularly frustrating.

    You turn the battery disconnect to OFF and reasonably assume the battery is now electrically isolated from the camper.

    That isn’t universally true.

    Some RVs have equipment connected in ways that allow certain loads to remain powered even when the primary disconnect is off.

    There can also be separate disconnects for equipment such as an inverter.

    So if an RV battery dies during storage despite using the battery disconnect, don’t immediately conclude that the battery must be defective.

    First determine what that disconnect actually isolates on your particular camper.

    This is exactly where the RV’s documentation and electrical diagrams become much more valuable than generic advice.

    The Battery May Never Have Been Fully Charged

    Before chasing hidden electrical loads, verify your starting point.

    A battery can appear charged without actually containing the amount of usable energy you expect.

    Maybe the RV was plugged in, but the charging system wasn’t operating correctly.

    Maybe it wasn’t connected long enough.

    Maybe the battery has lost capacity.

    Maybe the displayed voltage was influenced by active charging and was mistaken for the battery’s resting condition.

    If you start the night with a partially charged battery, normal overnight consumption can make the morning result look much worse than it really is.

    This becomes especially suspicious if the battery repeatedly “dies overnight” even after the RV has supposedly spent plenty of time charging.

    The overnight drain may only be exposing a charging problem that began hours or days earlier.

    A Weak Battery Can Look Like a Massive Electrical Drain

    Battery age and condition matter.

    As batteries deteriorate, they can lose usable capacity.

    Imagine having two containers that both appear full, except one has become much smaller internally.

    You can fill both, but the smaller one runs out sooner.

    A degraded battery can behave similarly from an owner’s perspective. It may reach a voltage that makes it appear charged and then drop much faster under load than a healthy battery of the same original capacity.

    That’s why a battery that repeatedly goes dead shouldn’t automatically be blamed on the camper.

    The battery itself belongs on the diagnostic list.

    Battery Type Changes the Way You Should Evaluate It

    Not every RV uses the same battery technology.

    You may have flooded lead-acid batteries, AGM batteries, lithium batteries or another configuration.

    Their charging requirements, discharge characteristics and useful voltage information aren’t identical.

    This matters when somebody gives you a single voltage number online and says:

    “If it reads this, your battery is bad.”

    That’s often an oversimplification.

    You need to know what type of battery you’re testing, whether it’s being charged or discharged at that moment, and what the battery manufacturer says about evaluating its state of charge and condition.

    One Battery May Simply Be Too Small for the Way You’re Camping

    Sometimes nothing is broken.

    You may simply be asking more from the battery than it can provide overnight.

    This is especially possible when dry camping.

    Imagine running lights during the evening, the water pump periodically, refrigerator controls, detectors, device charging and a furnace that cycles throughout a cold night.

    Every one of those loads takes energy from the same battery bank.

    An RV that spends most of its life plugged into campground power can hide an undersized battery setup because shore power continually supports the electrical system and charging equipment.

    Disconnect from shore power for a night and suddenly battery capacity matters a lot more.

    Cold Weather Can Make the Problem More Noticeable

    Cold weather and overnight battery trouble often arrive together for more than one reason.

    The furnace may run much more frequently, increasing electrical consumption.

    Battery performance and charging behavior can also be affected by temperature, with the exact effects depending heavily on battery chemistry.

    Lithium batteries introduce their own cold-temperature considerations, particularly around charging.

    Don’t apply lead-acid cold-weather advice blindly to a lithium system or vice versa.

    Follow the specifications for the battery actually installed.

    The Fastest Clue Is Often What Changed

    If your RV battery used to last through the night and suddenly doesn’t, ask yourself what changed immediately before the problem appeared.

    Did temperatures drop?

    Did you start using the furnace?

    Did you install an inverter?

    Did you add a refrigerator or other appliance?

    Did you replace the battery?

    Did the RV recently come out of storage?

    Did you disconnect from shore power for the first time in a while?

    Did you add solar equipment?

    Did you change a battery-disconnect setting?

    Did somebody leave a tank heater or other switch on?

    A sudden change in behavior deserves a search for a sudden change in conditions.

    What I’d Check First When an RV Battery Dies Overnight

    I wouldn’t begin by disconnecting random wires or buying electrical parts.

    I’d start by establishing the basic facts.

    Make Sure the Battery Starts Fully Charged

    Verify that the battery is actually being charged according to the requirements for your battery and charging equipment.

    If it isn’t reaching a proper charge, solve that problem first.

    There’s little value in analyzing overnight consumption when the battery begins every night partially discharged.

    Turn Off the Obvious Loads

    Look for lighting, fans, water pumps when not needed, entertainment equipment, tank heaters, antenna boosters and other manually controlled equipment.

    Check rather than assume.

    Look Closely at Furnace Use

    If it’s cold outside, note how frequently the furnace runs.

    If the battery lasts normally during warm nights and struggles only when the furnace is heavily used, that’s valuable diagnostic information.

    Check the Inverter

    Determine whether your RV has one and whether it’s operating.

    Then determine what AC equipment is being supplied by it.

    Understand the Battery Disconnect

    Find out what your particular disconnect actually shuts off.

    Don’t assume every circuit passes through it.

    Consider Battery Condition and Capacity

    An older, damaged or undersized battery may simply not have enough usable capacity for the overnight load.

    Compare Overnight Behavior

    Once you know the battery starts properly charged, note its condition before bed and again in the morning.

    Then repeat the test after deliberately reducing optional electrical loads.

    If the result improves dramatically, you’ve learned something.

    How Parasitic Draw Testing Helps Narrow the Problem

    If the battery is healthy, starts properly charged and still loses an unreasonable amount of energy with everything you can identify turned off, parasitic-draw testing may be the next step.

    The idea is to measure how much current continues flowing from the battery when the RV is supposed to be largely inactive.

    Then circuits can be investigated methodically to determine where the current is going.

    This is far more useful than randomly disconnecting components.

    But there’s an important distinction between a parasitic draw and an abnormal parasitic draw.

    Some electrical consumption while the RV is connected is expected on many campers.

    You’re looking for consumption that doesn’t make sense for the equipment and operating condition.

    Don’t Guess With High-Current Battery Wiring

    RV battery systems can deliver a tremendous amount of current.

    A 12-volt system may sound harmless compared with household voltage, but accidentally shorting a battery can create severe heat, sparks and fire risk.

    If you’re not comfortable measuring current correctly or don’t know how your meter needs to be configured, don’t improvise.

    A qualified RV technician or automotive electrical technician can perform a parasitic-draw test without turning troubleshooting into another problem.

    What If the Battery Dies While the RV Is Plugged In?

    That’s a different clue.

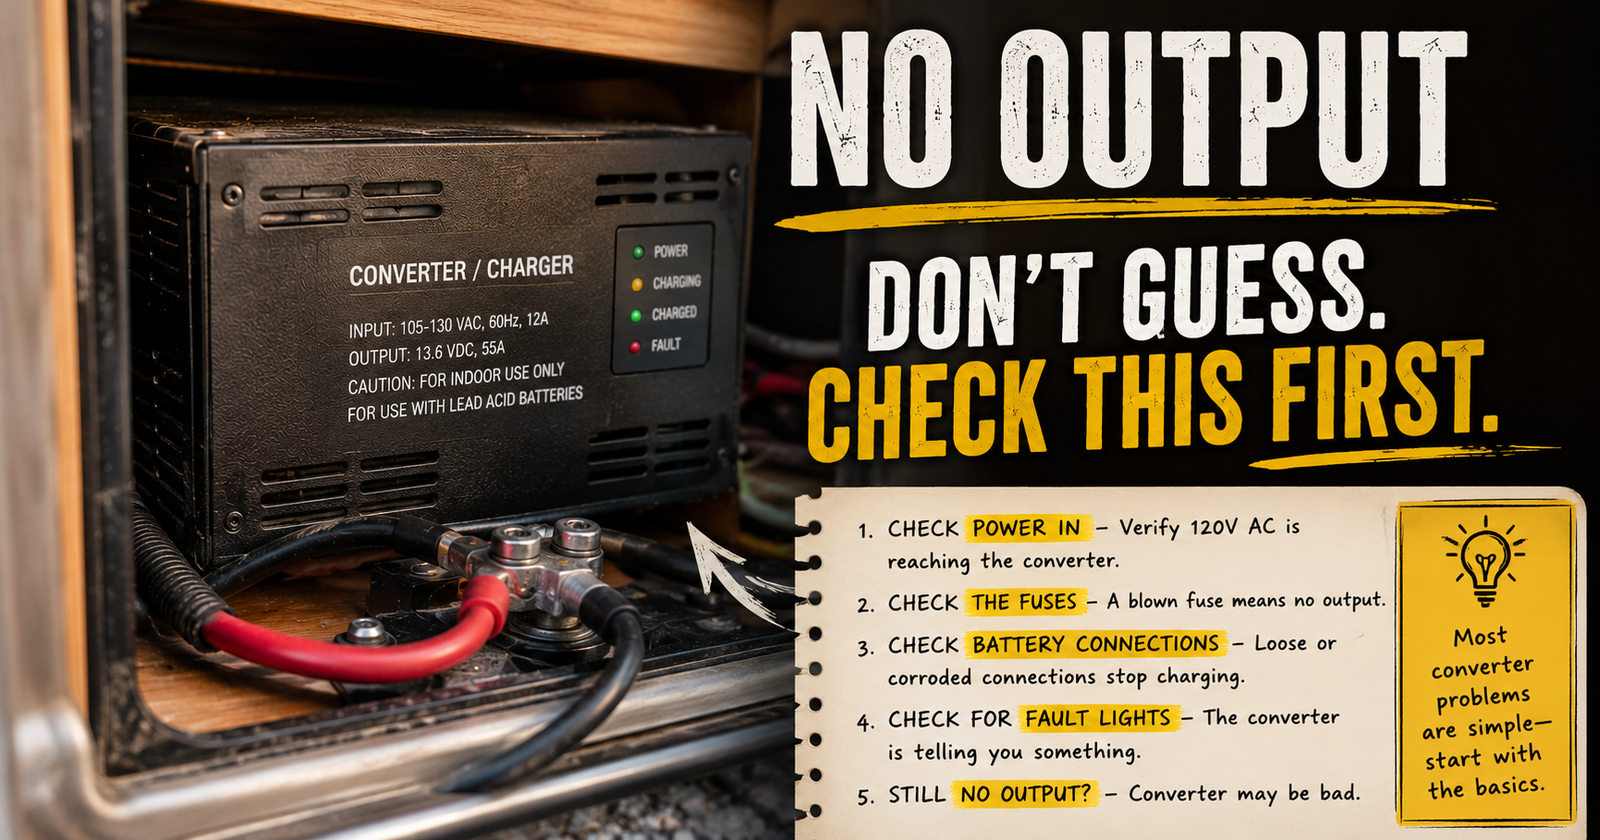
    If you’re connected to functioning shore power and the battery continues losing charge, I’d start thinking much more seriously about the charging side of the electrical system.

    The converter or inverter/charger, circuit protection, wiring, battery connections, configuration and battery itself can all become relevant depending on the RV.

    A battery dying while boondocking and a battery dying despite being connected to shore power may produce the same dead-battery result, but the diagnostic paths are not the same.

    What If the Battery Dies During Storage?

    Storage changes the situation again.

    A camper can sit quietly while small electrical loads slowly discharge the battery.

    The longer it sits, the more important those seemingly tiny loads become.

    If your battery survives a normal camping night but dies after the RV sits unused for days or weeks, I’d investigate storage-related parasitic loads and the actual behavior of the battery disconnect before blaming ordinary overnight camping consumption.

    Battery maintenance during storage also depends on battery chemistry and the RV’s charging arrangement.

    What If a New RV Battery Still Dies Overnight?

    A new battery doesn’t eliminate the rest of the electrical system.

    If you replaced the old battery and the new one quickly develops the exact same symptom, stop treating battery replacement as the solution.

    Verify charging.

    Verify actual overnight loads.

    Verify battery capacity.

    Check the inverter and other equipment.

    Investigate abnormal parasitic draw if appropriate.

    Also confirm that the replacement battery is appropriate for the charging system and application.

    A new component can still be installed into a system that contains the original problem.

    What If the Battery Is Dead Every Morning but Fine During the Day?

    Look carefully at what operates specifically at night.

    The furnace is an obvious candidate during cold weather.

    Lighting use increases after dark.

    Entertainment equipment and device charging may increase in the evening.

    Solar charging disappears overnight.

    That last point matters.

    During daylight, solar can mask some of your electrical consumption by continuously putting energy back into the battery bank.

    Once the sun goes down, you’re living entirely on stored energy unless another charging source is operating.

    A battery problem that seems to happen “only at night” can therefore be a simple imbalance between evening consumption and available battery capacity.

    Solar Doesn’t Automatically Prevent a Dead Battery Overnight

    Solar panels can’t replenish the battery when there’s no useful sunlight.

    What matters is whether the solar system replaces enough energy during the day to make up for what you consumed overnight and throughout the rest of the day.

    Cloud cover, shading, season, panel capacity, battery capacity and electrical usage all influence that balance.

    A camper can have solar panels on the roof and still experience chronically undercharged batteries.

    “Has solar” and “receives enough charging energy” aren’t the same statement.

    When I’d Suspect the Battery Itself

    I’d move battery condition higher on the list when the battery loses voltage unusually quickly under modest loads, won’t accept or retain an appropriate charge, has obvious physical problems, is known to be old or continues behaving badly after charging and load issues have been investigated.

    Physical warning signs deserve particular attention.

    A swollen battery, excessive heat, leaking battery or unusual odor isn’t something to casually keep using while you troubleshoot for another week.

    Stop and follow the battery manufacturer’s safety guidance.

    When I’d Suspect an RV Electrical Problem Instead

    I’d look harder at the RV when a known-good battery repeatedly drains, the problem follows a particular circuit or piece of equipment, the discharge occurs even when expected loads are minimized, charging behavior is abnormal, or the problem began after electrical work or equipment installation.

    At that point, the battery may simply be the victim.

    Something else in the camper is consuming energy or preventing that energy from being replenished.

    Don’t Ignore the Pattern

    One dead battery can happen because somebody left something on.

    A battery that dies every single night is a pattern.

    And patterns are useful.

    If it happens only in cold weather, investigate what cold weather changes.

    If it happens only while dry camping, compare your actual consumption with your battery capacity.

    If it happens during storage, investigate loads that remain connected.

    If it happens while plugged in, investigate charging.

    If it started after installing equipment, inspect that change.

    If replacing the battery doesn’t fix it, stop replacing batteries.

    You don’t need to guess your way through the entire RV electrical system. Narrow the problem according to when the battery dies and what the camper is doing at the time.

    When It’s Time to Have the RV Tested

    If you’ve confirmed the battery is appropriately charged, minimized known loads and still experience severe overnight discharge, measuring actual current draw can tell you far more than another round of guessing.

    Likewise, a battery that repeatedly won’t charge properly deserves diagnosis of both the battery and charging system.

    The important thing is not to treat “dead battery” as a diagnosis.

    It’s a symptom.

    Your job is to determine whether the energy was never put into the battery, was consumed normally, disappeared through an abnormal load, or can no longer be stored properly because the battery itself has deteriorated.

    Once you know which of those is happening, the mystery of an RV battery dying overnight becomes a much smaller problem.

    Written by Evan Mercer

    Evan Mercer writes about RV systems, camper troubleshooting, maintenance and everyday ownership questions for CamperAnswers.com. His work focuses on turning technical information and manufacturer guidance into practical answers ordinary RV owners can actually use.

  • How an RV Works – A Complete Guide for Camper Owners

    How an RV Works – A Complete Guide for Camper Owners

    How an RV Works - A Complete Guide for Camper Owners

    An RV can look surprisingly simple from the outside. You have a place to sleep, a small kitchen, a bathroom, some lights, an air conditioner and maybe a few slide-outs.

    Behind the walls, floor and cabinets, though, several completely different systems are working together.

    Your RV may have 12-volt DC electricity and 120-volt AC electricity. It can have batteries, shore power, a converter, an inverter, solar panels and a generator. There’s a fresh water system, wastewater system, propane system, heating and cooling equipment, refrigerators, water heaters, roof components, seals, tires, brakes, suspension and potentially several electric or hydraulic mechanisms.

    That sounds complicated, but you don’t need to become an RV technician to understand the basics.

    Once you understand where your electricity comes from, where your water goes, what propane operates, what your batteries actually power and how the major components depend on each other, RV ownership becomes much less confusing.

    It also becomes easier to troubleshoot problems.

    Pin

    A light that doesn’t work, an outlet that suddenly goes dead and an air conditioner that won’t start may all seem like electrical problems, but they can involve completely different sides of the electrical system.

    The same thing happens with water. A faucet with weak flow could involve the campground water supply, a pressure regulator, the fresh water tank, the pump, a valve, a filter or the plumbing itself.

    This guide gives you the big picture of how an RV works, what the major systems do and how those systems interact.

    What Exactly Is an RV?

    RV stands for recreational vehicle, but that’s a very broad term.

    Some RVs are trailers that need another vehicle to tow them. Others have their own engine and drivetrain. Some are enormous enough to feel like small houses, while others can fit into a regular parking space.

    The systems inside them can also be very different.

    A small pop-up camper may have a relatively simple electrical and plumbing setup. A large Class A motorhome can have multiple air conditioners, several batteries, an inverter/charger, an onboard generator, automatic transfer equipment, hydraulic leveling, multiple slide-outs and a much more complicated plumbing system.

    That’s why one of the most important things to understand about RVs is that there isn’t one universal RV design.

    CamperAnswers.com

    Travel Trailers

    A travel trailer is a towable RV that normally connects to a tow vehicle using a conventional bumper-pull or frame-mounted hitch arrangement.

    Travel trailers range from tiny lightweight campers to large multi-slide units with full kitchens, bathrooms and bedrooms.

    Because the trailer doesn’t have its own propulsion engine, many of its systems are dedicated specifically to the living portion of the RV.

    Fifth Wheels

    A fifth wheel is another towable RV, but its hitch connection is located in or over the bed of a pickup truck.

    That creates the distinctive raised front section found on most fifth wheels.

    Large fifth wheels can contain some of the most elaborate residential-style systems found in towable RVs, including multiple slides, large refrigerators, washer and dryer hookups, multiple air conditioners and extensive electrical systems.

    Class A Motorhomes

    Class A motorhomes are the large bus-shaped RVs most people picture when they hear the word motorhome.

    Because they’re self-propelled, they have both vehicle systems and house systems.

    That distinction matters.

    A Class A can have a chassis battery used to start and operate the vehicle along with a separate house battery bank that powers equipment in the living area.

    Class B Camper Vans

    Class B RVs are built around a van-style platform.

    They’re smaller, but that doesn’t necessarily make their systems simple. Modern camper vans can pack batteries, solar charging, inverters, water tanks, heaters, refrigerators and sophisticated electrical controls into a very small space.

    Class C Motorhomes

    A Class C motorhome is typically recognizable by the living or sleeping area extending over the cab.

    Like a Class A, it combines automotive systems with RV house systems.

    Truck Campers

    A truck camper sits in the bed of a pickup truck rather than being towed behind it.

    These can range from very simple campers to surprisingly well-equipped units with bathrooms, water heaters, furnaces, refrigerators and slide-outs.

    Pop-Up Campers

    Pop-up campers collapse for towing and expand at the campsite.

    Family camping near their pop up camper behind them

    Their systems are generally smaller than those found in large travel trailers and fifth wheels, although equipment varies considerably.

    Toy Haulers

    A toy hauler incorporates a cargo area designed to carry things such as motorcycles, ATVs or other recreational equipment.

    Toy haulers can be travel trailers, fifth wheels or even motorized RVs.

    Destination Trailers

    Destination trailers look somewhat like oversized travel trailers but are generally designed to remain at a location for longer periods rather than being moved constantly.

    They still share many systems with conventional RVs.

    The important point is that CamperAnswers.com uses terms such as RVcampertravel trailerfifth wheel and motorhome according to the equipment or problem being discussed. The basic systems often overlap, but the exact components and layouts can differ dramatically.

    The Easiest Way to Understand How an RV Works

    Instead of looking at an RV as one complicated machine, think of it as several smaller systems living inside the same structure.

    The major systems include:

    1. The 12-volt DC electrical system
    2. The 120-volt AC electrical system
    3. Batteries and charging
    4. Shore power
    5. Generators
    6. Solar charging
    7. Propane
    8. Fresh water and plumbing
    9. Wastewater and holding tanks
    10. Water heating
    11. Heating and air conditioning
    12. Refrigeration and appliances
    13. Slide-outs and other powered equipment
    14. Leveling and stabilization
    15. Roofs, seals and weather protection
    16. Tires, wheels, suspension and brakes
    17. Towing or motorized chassis systems
    18. Safety equipment

    Understanding which system a component belongs to is often the first step toward figuring out why it isn’t working.

    Your RV Actually Has Two Main Electrical Systems

    Electrical power is one of the biggest sources of confusion for new RV owners because most RVs don’t simply have “electricity.”

    They commonly have two electrical systems operating at different voltages.

    There’s a 12-volt DC system and a 120-volt AC system.

    They can work together, but they aren’t the same thing.

    What the 12-Volt System Does

    The 12-volt side is the low-voltage DC electrical system.

    Depending on the RV, it commonly operates things such as interior lights, vent fans, water pumps, control boards, detectors and portions of appliances.

    This is one reason an appliance can require 12-volt power even when its main source of heat or energy is propane or 120-volt electricity.

    An RV furnace is a great example. Propane may provide the heat, but the furnace can still need 12-volt electricity to operate its blower, controls and ignition system.

    That means having propane in the tank doesn’t guarantee the furnace will work if the 12-volt electrical system has a problem.

    What the 120-Volt System Does

    The 120-volt AC system is much closer to the electricity you’re accustomed to using inside a house.

    It can supply power to standard wall outlets and higher-demand equipment such as air conditioners and microwaves.

    Depending on the RV and appliance configuration, it may also power an electric water-heater element, refrigerator heating element or other equipment.

    This is generally the side supplied when you connect the RV to shore power.

    A generator can also provide 120-volt AC power.

    An inverter can create 120-volt AC power from battery-supplied DC power when the RV is equipped and configured for it.

    Why Understanding 12V Versus 120V Matters

    Suppose all of your RV’s lights work but none of the wall outlets do.

    That’s an important clue.

    The lights may be operating from the 12-volt system while the outlets depend on 120-volt AC power.

    The fact that the lights work doesn’t prove that shore power is reaching the RV.

    The opposite can happen too. You could have functioning 120-volt outlets while experiencing problems with 12-volt lights or equipment.

    Thinking in terms of systems immediately makes troubleshooting more logical.

    What RV House Batteries Actually Do

    House batteries store DC electrical energy for the living portion of the RV.

    When you’re disconnected from shore power, those batteries can continue supplying compatible 12-volt equipment.

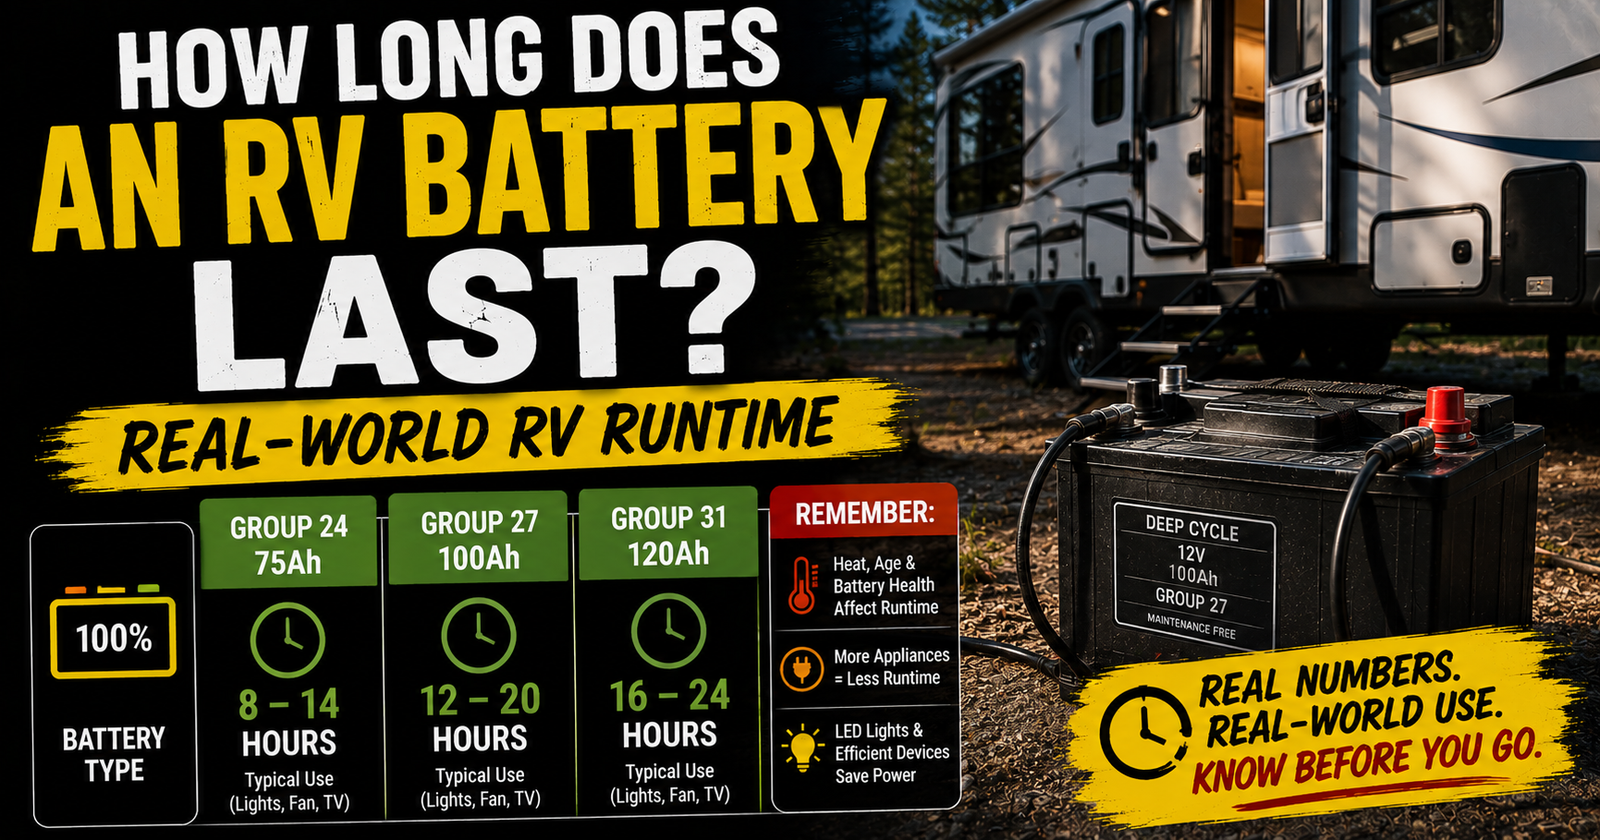
    Exactly what you can operate and for how long depends on the battery bank, battery chemistry, battery condition, electrical loads and other equipment installed in the RV.

    Motorhomes may also have a separate chassis or starting battery.

    That distinction is important because the battery used to start the engine isn’t necessarily the same battery bank supplying the living area.

    RV Batteries Don’t Create Unlimited Power

    A battery stores a finite amount of usable energy.

    Every light, fan, control board, water pump and other electrical load takes some of that stored energy.

    Larger loads consume it much faster.

    That’s why understanding battery capacity and charging becomes especially important when camping without hookups.

    Common RV Battery Types

    RV owners may encounter flooded lead-acid, AGM and lithium-based batteries, among other configurations.

    These aren’t interchangeable in every situation without considering charging requirements and the equipment already installed in the RV.

    Battery chemistry can affect charging behavior, usable capacity, maintenance and operating characteristics.

    This is another area where knowing exactly what equipment your particular RV contains matters more than relying on a generic answer.

    How RV Batteries Get Recharged

    Using battery power is only half of the equation.

    Eventually that energy has to be replaced.

    Depending on the RV, charging can come from one or more sources, including shore power through charging equipment, a generator, solar panels or the vehicle’s charging system.

    Not every RV handles those sources in exactly the same way.

    This becomes extremely important when diagnosing a battery that keeps going dead.

    The battery itself might be bad, but a perfectly good battery can also become discharged because the expected charging source isn’t actually charging it.

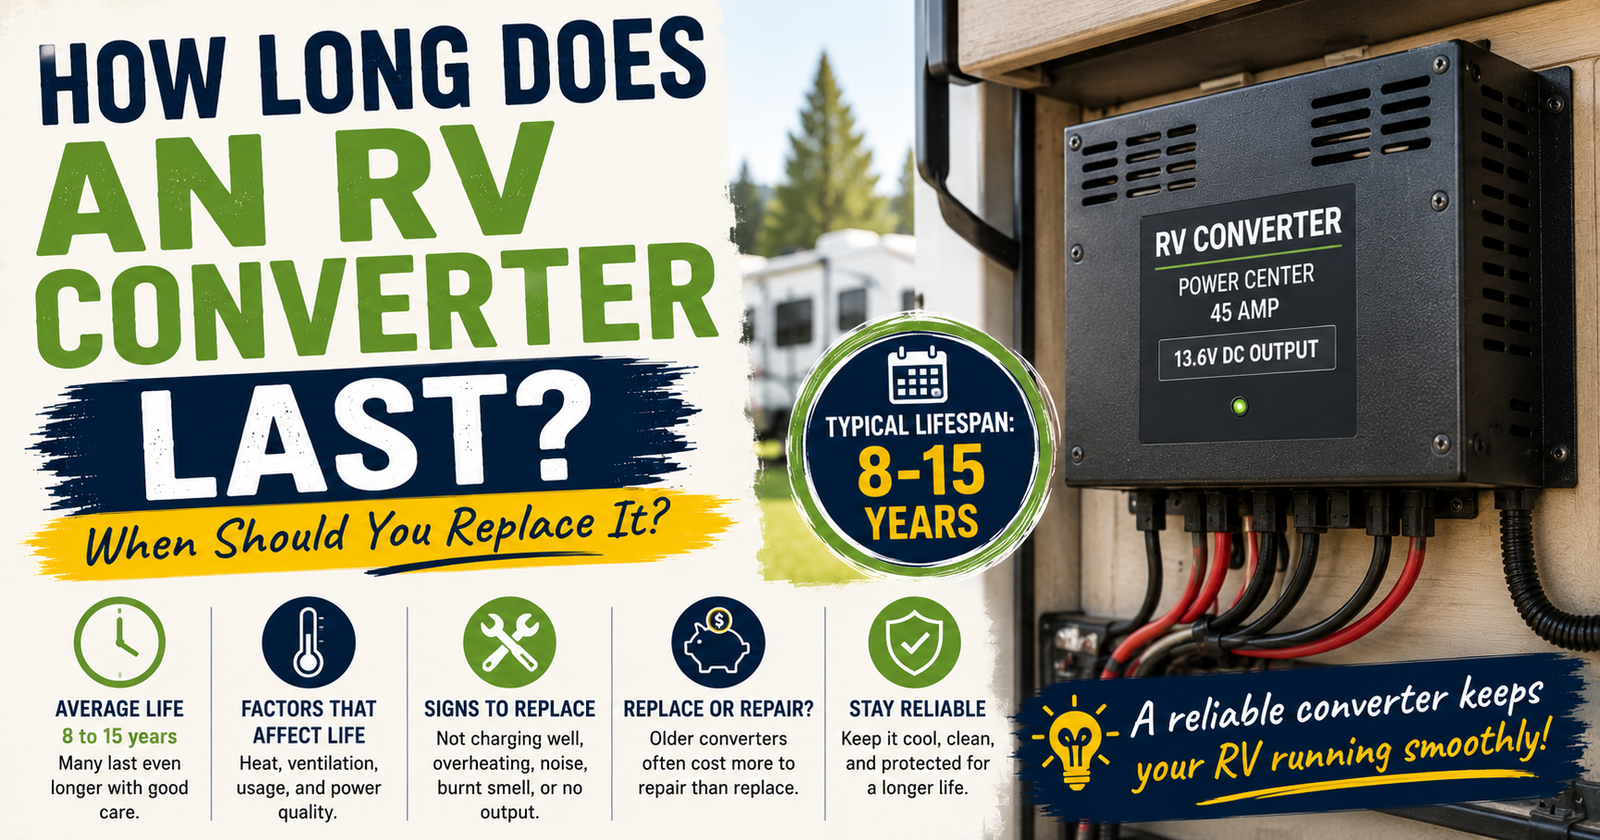
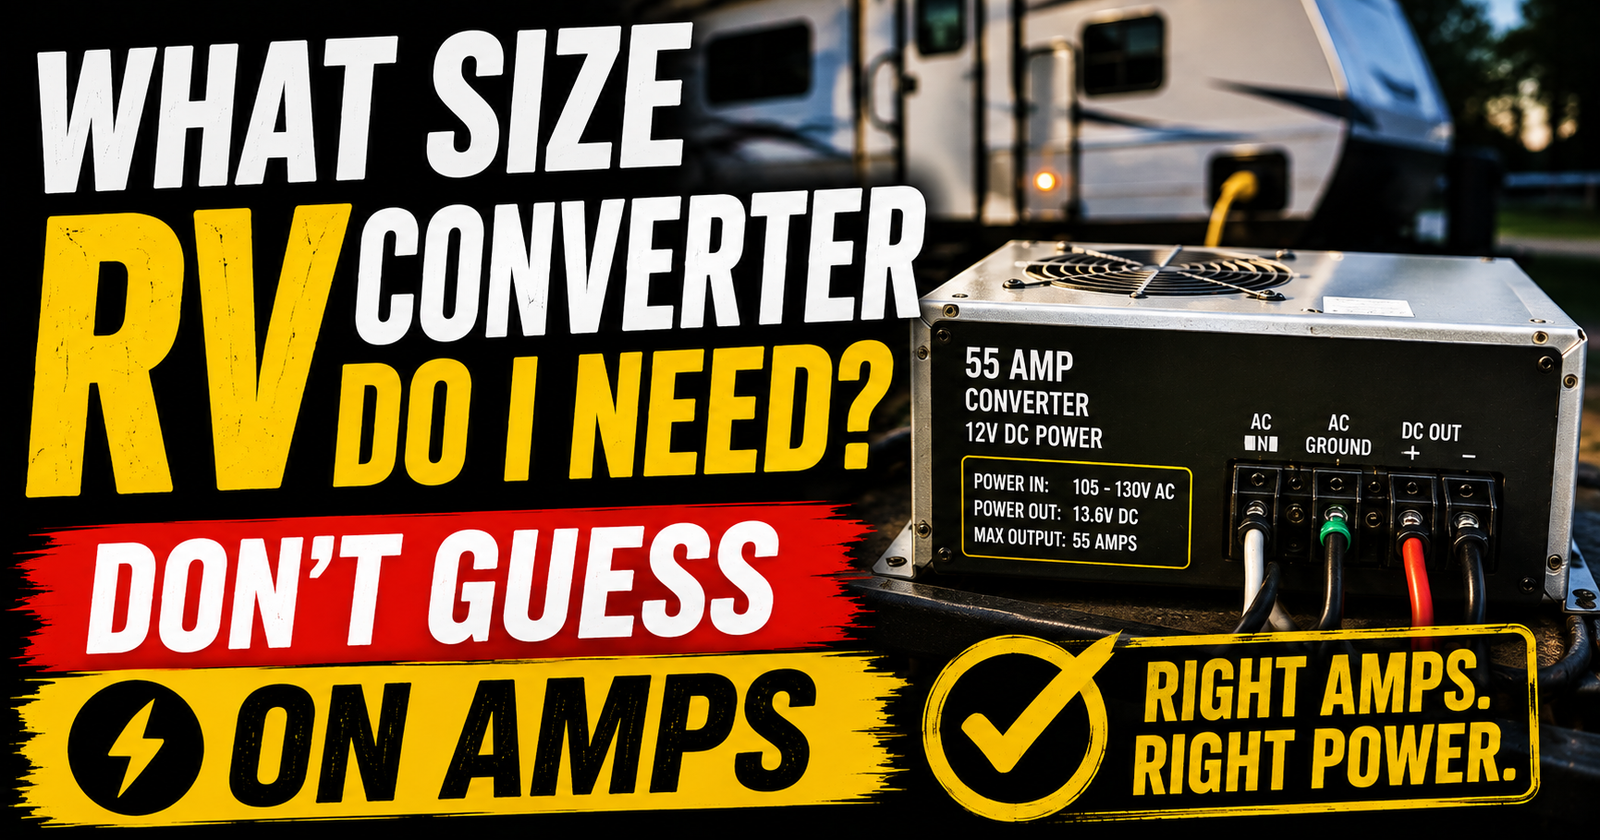
    What an RV Converter Does

    The converter is one of the most important components to understand in a conventional RV electrical system.

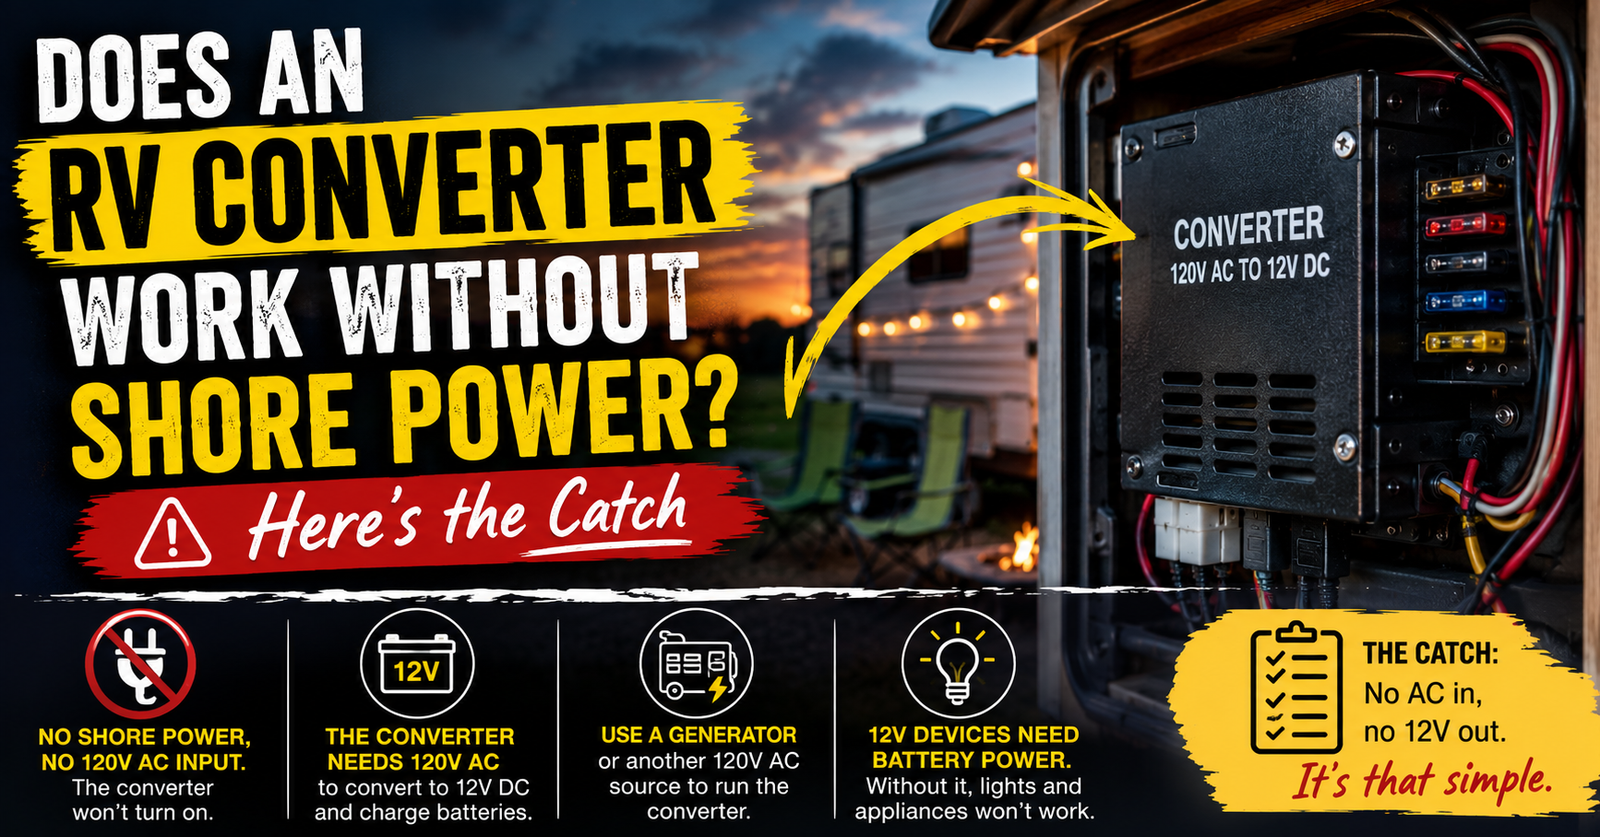
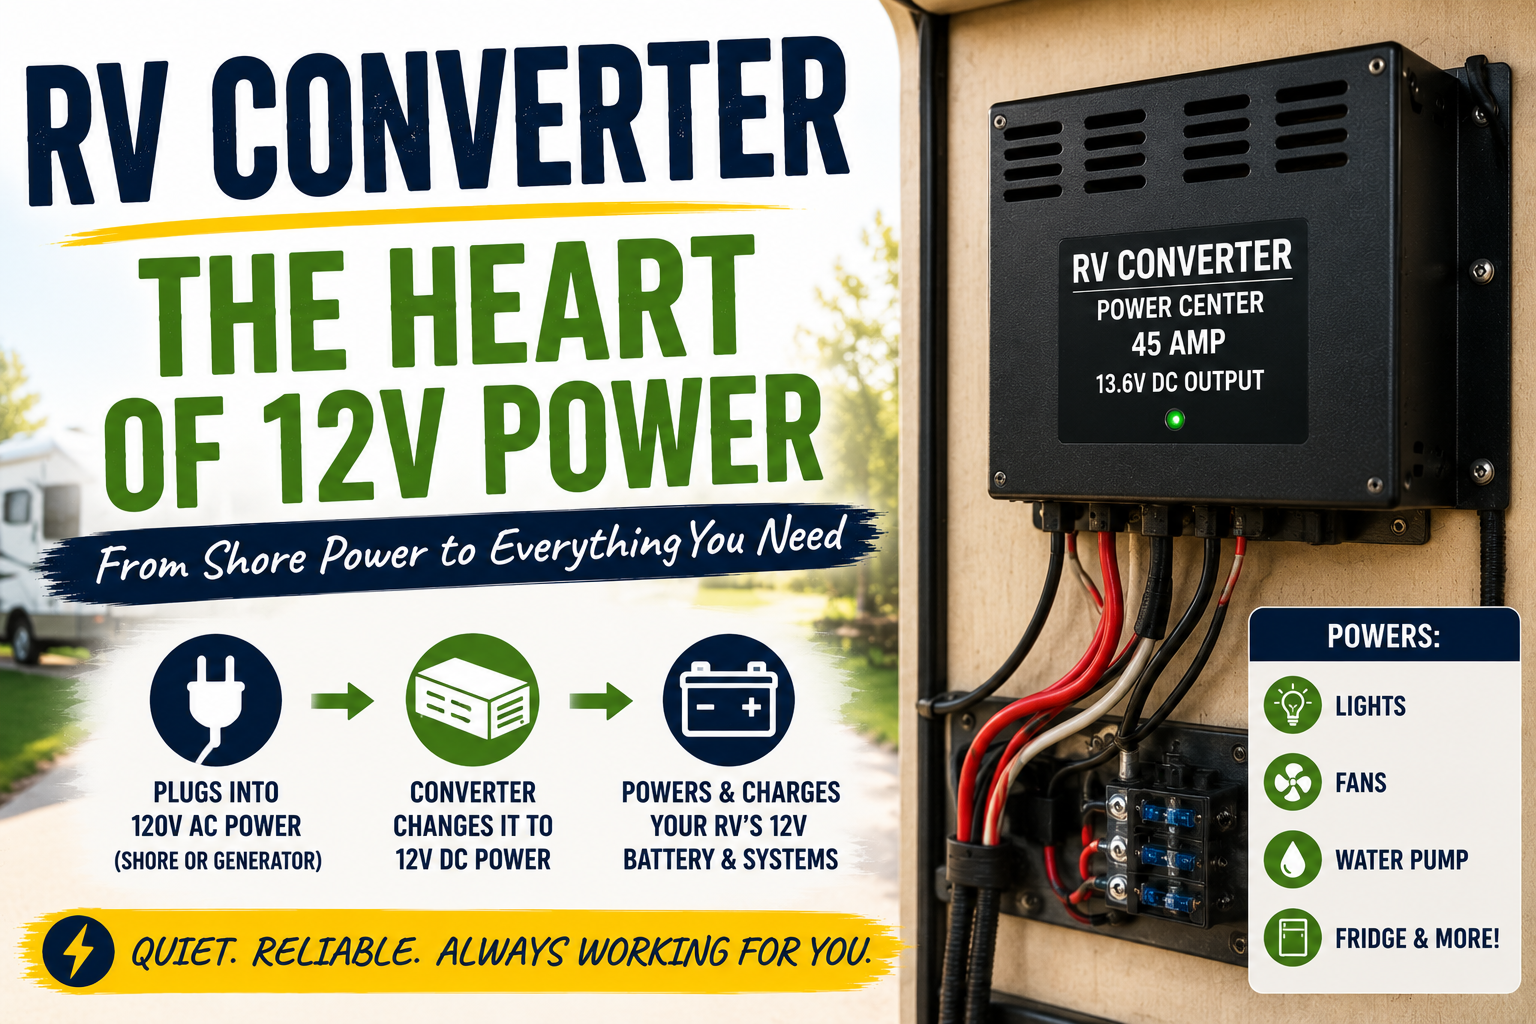
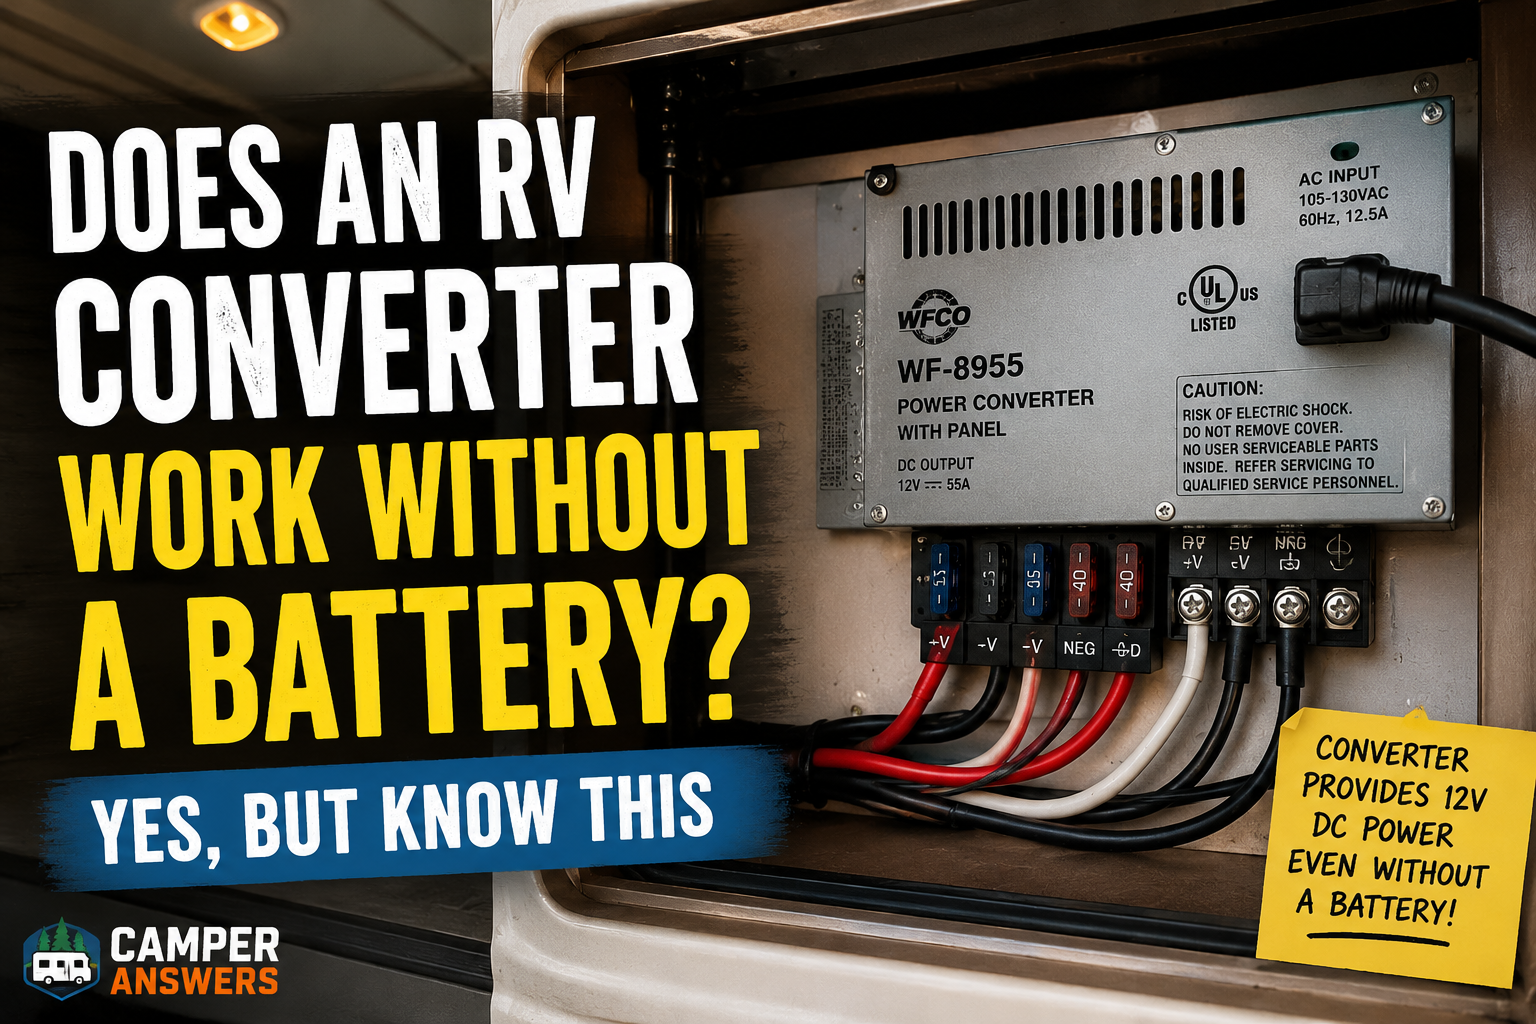
    In simple terms, it takes AC power and converts it into DC power that the RV’s 12-volt system can use.

    Depending on the system design, charging the house battery bank is also part of its job.

    This explains something that initially seems strange to many owners.

    You can plug the camper into 120-volt shore power and still need the RV’s 12-volt system.

    The converter helps bridge those two electrical worlds.

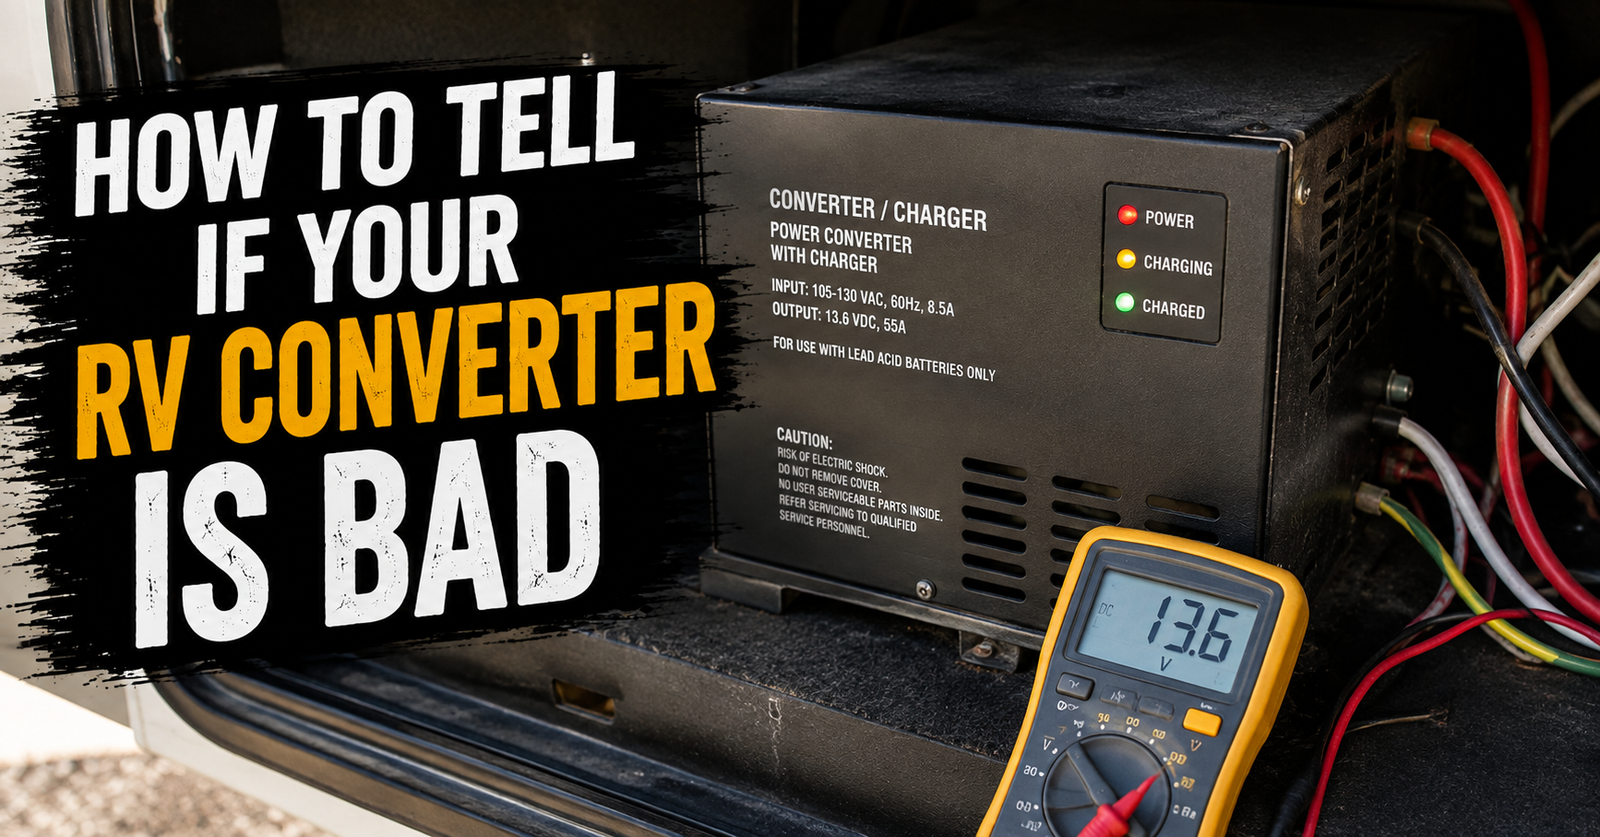
    A problem involving the converter can therefore create symptoms that look like a battery problem or a broader 12-volt problem.

    A Converter and an Inverter Are Not the Same Thing

    These names sound similar enough that they’re constantly confused.

    Their basic jobs go in opposite directions.

    A converter converts AC power to DC power.

    An inverter converts DC power into AC power.

    An inverter allows energy stored in batteries to operate compatible AC equipment.

    However, having an inverter doesn’t necessarily mean every wall outlet or every AC appliance in the RV can operate from the batteries.

    Inverter size, battery-bank capacity and the way the RV is wired all matter.

    Some RVs use inverter/charger units that combine multiple functions into one piece of equipment.

    Again, identify the equipment actually installed before assuming how a particular RV should behave.

    What Shore Power Means

    Shore power is an external AC electrical source connected to the RV.

    At a campground, this normally comes from the electrical pedestal at your campsite.

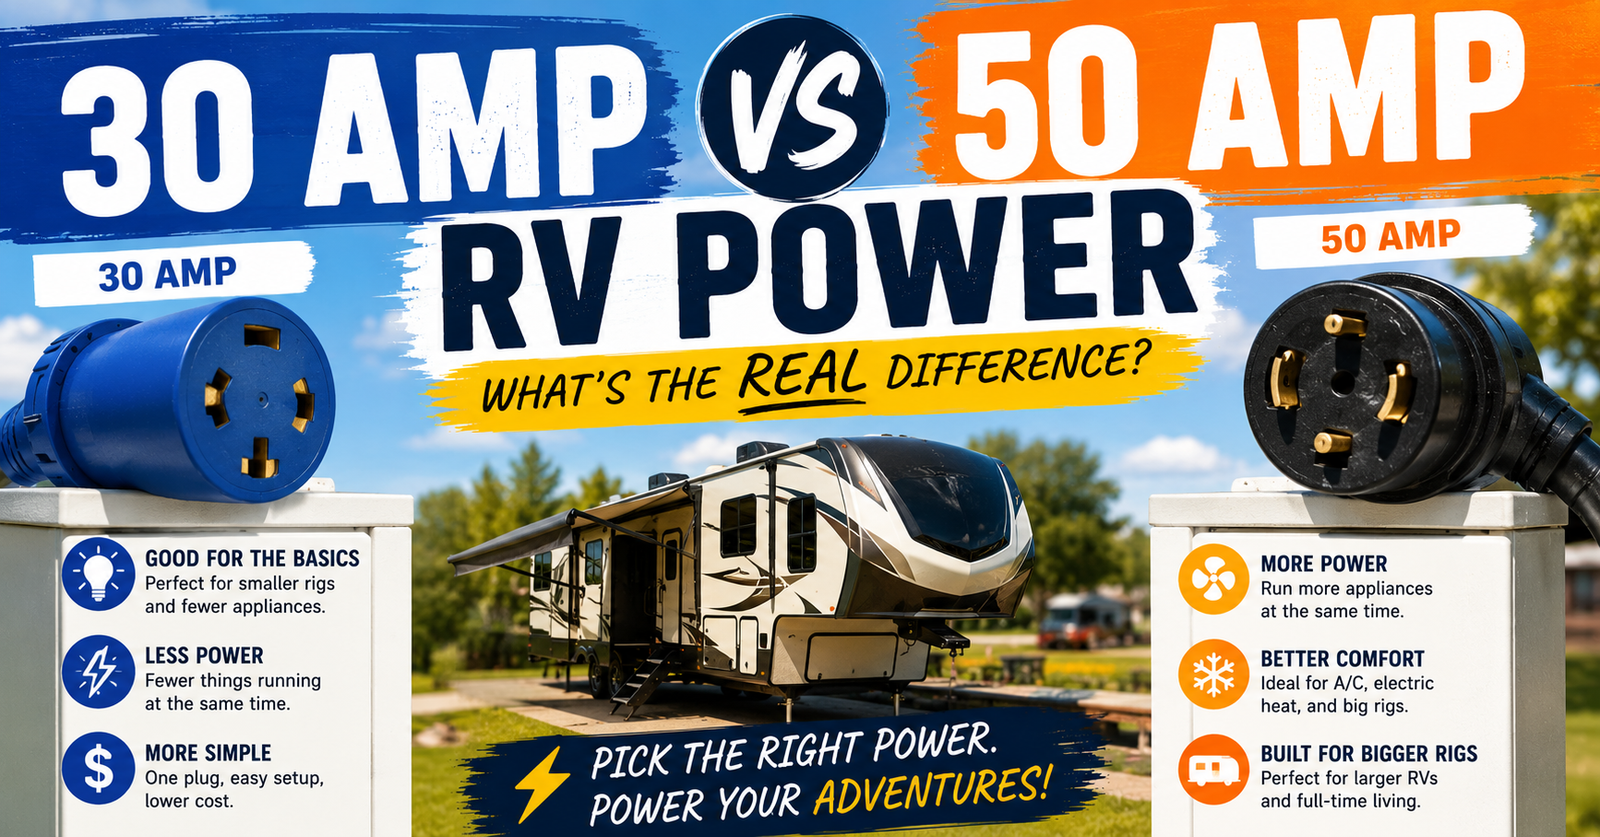
    RVs commonly use 30-amp or 50-amp electrical service, although smaller campers may use other arrangements.

    30-Amp and 50-Amp RV Service Are Significantly Different

    It’s easy to look at the numbers and assume 50-amp service simply gives you 20 more amps than 30-amp service.

    That’s not an accurate picture of the available electrical capacity.

    The configurations differ, and 50-amp RV service can provide substantially more total power than 30-amp service.

    This matters when you’re trying to operate several high-demand appliances at the same time.

    An RV with multiple air conditioners, an electric water heater, microwave and other large loads can require careful power management, particularly when available service is limited.

    What Happens After You Plug In

    Once properly connected to a compatible power source, AC electricity can be distributed through the RV’s electrical panel to its AC circuits.

    The converter or charging equipment can also begin supporting the DC system and charging the batteries, depending on the system.

    That single shore-power cord can therefore affect both sides of the RV’s electrical operation.

    Breakers and Fuses Protect Different Circuits

    RVs commonly contain both circuit breakers and fuses.

    Circuit breakers are generally associated with AC circuits.

    Fuses are commonly used throughout the DC system.

    If an air conditioner or wall outlet stops working, the diagnostic path can therefore be very different from a 12-volt light or water pump that stops working.

    Repeatedly tripping a breaker or blowing a fuse should not simply be treated as an inconvenience.

    Protection devices operate for a reason. Continually resetting or replacing them without identifying why they’re opening can hide a real electrical problem.

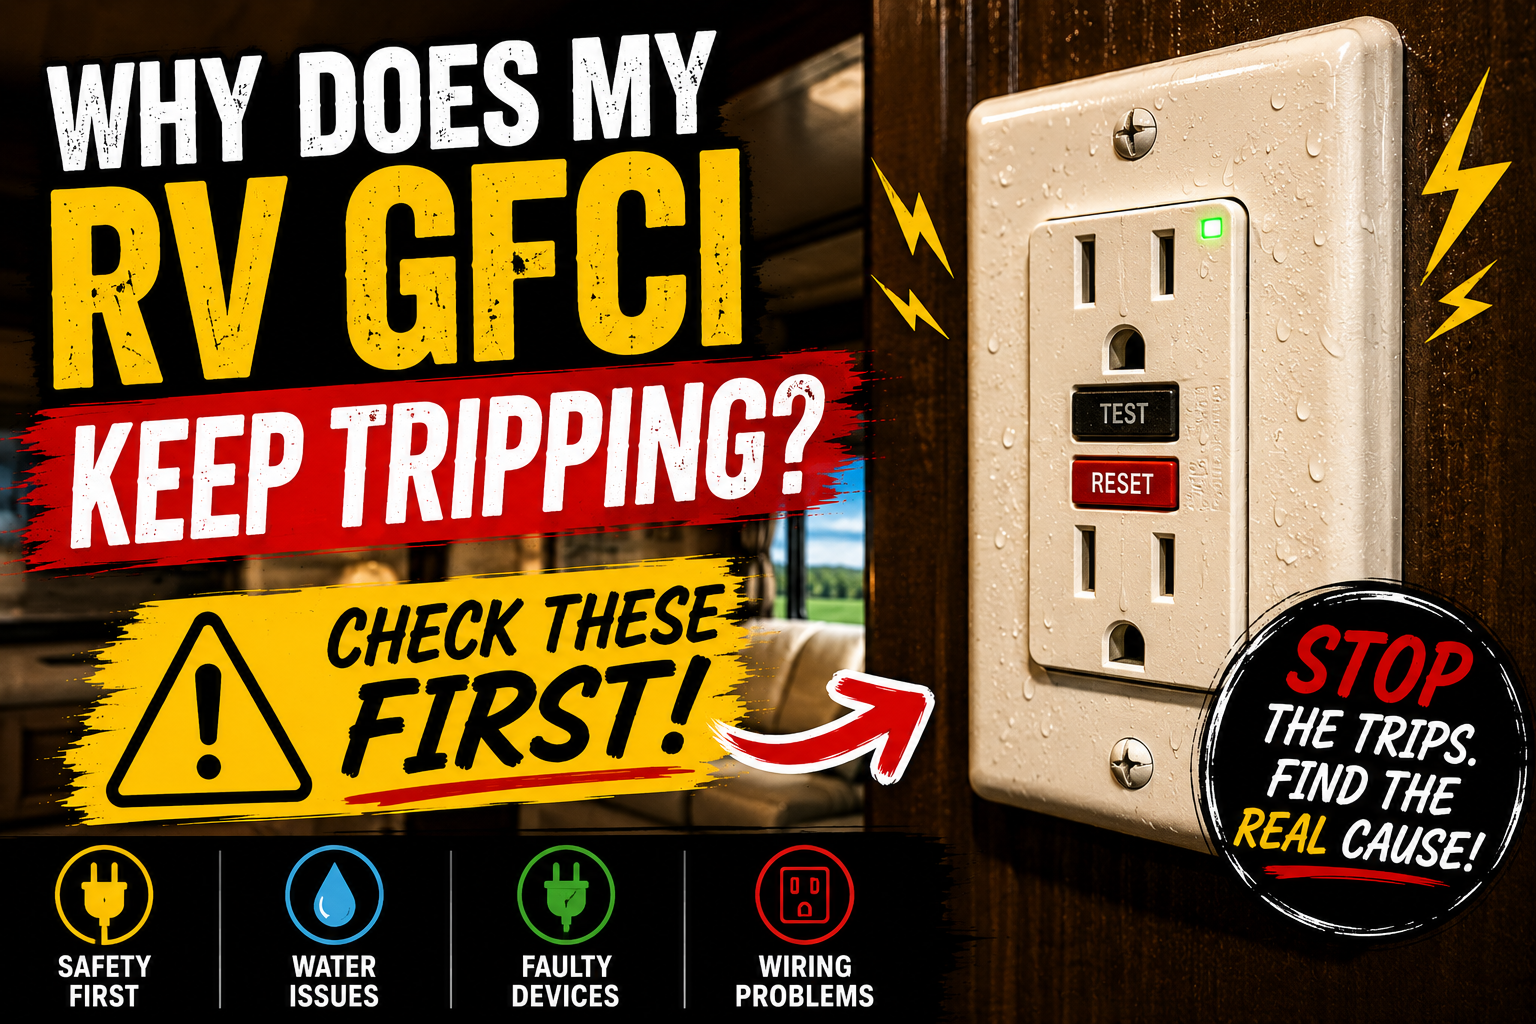
    What GFCI Protection Does

    Some RV receptacles use ground-fault circuit-interrupter protection.

    A GFCI can trip when it detects an imbalance consistent with current leaking from its intended path.

    One GFCI device may also protect other receptacles downstream.

    That means a dead outlet isn’t always caused by a bad outlet.

    A tripped GFCI somewhere else in the RV may be involved.

    Bathrooms, kitchens and exterior areas are common places where owners encounter GFCI-protected circuits.

    How an RV Generator Fits Into the Electrical System

    Many motorhomes and some larger towable RVs have onboard generators. Portable generators are also used with RVs when properly selected and connected.

    A generator provides an alternative source of AC electricity when shore power isn’t available.

    That can allow operation of equipment that would otherwise require an external AC connection.

    An onboard generator may supply the RV through transfer equipment that determines which AC source is feeding the coach.

    Generator problems can therefore fall into two broad categories.

    The generator may fail to run correctly, or the generator may run while power still fails to reach the RV.

    Those are different problems and shouldn’t automatically be diagnosed the same way.

    What an Automatic Transfer Switch Does

    RVs equipped with multiple AC power sources may use a transfer switch.

    Its job is to manage the connection between appropriate power sources so they aren’t simply tied together.

    This becomes especially relevant in motorhomes with onboard generators.

    If a generator runs normally but the coach isn’t receiving its output, the problem may not necessarily be the generator engine itself.

    Electrical distribution after the generator matters too.

    How RV Solar Power Works

    Solar adds another layer to the charging system.

    Solar panels produce electricity from sunlight, but the panels are only one part of a typical RV solar setup.

    A solar installation generally also involves a charge controller, wiring, protection equipment and the battery bank.

    Larger systems may include substantial inverter capacity and sophisticated monitoring equipment.

    Solar Usually Means Battery Charging First

    One common misconception is that a solar panel directly powers everything inside the camper whenever the sun is shining.

    A more useful way to think about many RV solar systems is that solar contributes energy to the DC electrical system and battery bank through a charge controller.

    The stored battery energy can then support DC loads and, when an inverter is involved, certain AC loads.

    The exact arrangement varies considerably.

    RV Electrical Safety Deserves Respect

    RV electrical systems combine low-voltage DC circuits, high-current battery systems and household-voltage AC circuits in a relatively compact space.

    Basic owner checks such as identifying a tripped breaker, checking a fuse according to manufacturer instructions or looking at a battery monitor are very different from opening energized electrical equipment and probing live conductors.

    If diagnosis requires exposure to dangerous voltage or you’re unsure what you’re testing, professional service is the safer choice.

    How the RV Fresh Water System Works

    Now we can move from electricity to another major system: water.

    An RV generally needs to handle water in two different situations.

    You may carry fresh water with you.

    Or you may connect directly to an external pressurized water source.

    That’s why most equipped RVs have both a fresh water tank system and a city-water connection.

    What the Fresh Water Tank Does

    The fresh water tank stores water onboard.

    This lets you use sinks, showers and toilets when you’re not connected to campground water.

    But simply having water in the tank isn’t enough.

    That water needs to be moved through the plumbing.

    That’s where the water pump comes in.

    How an RV Water Pump Works

    The water pump pulls water from the fresh water tank and pressurizes the plumbing system.

    When you open a faucet, pressure drops and the pump can run to restore it.

    When you close the faucet and the plumbing reaches the pump’s shutoff pressure, the pump should normally stop.

    That simple relationship explains a huge number of RV water-pump symptoms.

    If the pump keeps running with everything closed, the plumbing may not be reaching the pressure necessary for the pump to stop.

    If the pump runs but no water arrives, the problem may be on the supply side.

    If it rapidly turns on and off, you’re dealing with another set of possibilities.

    Understanding what the component is trying to accomplish makes troubleshooting much easier than simply replacing parts.

    What City Water Does Differently

    When you’re connected to a pressurized campground water source through the appropriate city-water connection, the external supply provides the pressure.

    You normally don’t need the onboard pump to pull water from the fresh tank at the same time.

    The campground supply enters the RV’s plumbing system and feeds fixtures directly.

    Depending on the RV’s plumbing design and valve arrangement, check valves and selector valves may control where water can travel.

    A failure or incorrect valve position can sometimes cause unexpected behavior, such as the fresh tank filling while connected to city water.

    Why RV Water Pressure Matters

    More pressure isn’t automatically better.

    RV plumbing components have pressure limits, and campground water pressure can vary.

    That’s why RV water-pressure regulators are commonly used between an external water source and the camper.

    Low pressure creates its own frustrations.

    Weak flow at every fixture can come from the supply, regulator, filter or other restriction.

    Weak flow at only one fixture points the investigation in a different direction.

    Once again, symptoms help narrow the system.

    Why Air Sometimes Gets Into RV Water Lines

    Sputtering faucets are common after an RV has been winterized, drained or otherwise had air introduced into its plumbing.

    Air can also appear when the pump has trouble drawing a consistent water supply.

    The circumstances matter.

    Sputtering immediately after refilling an empty system is different from a system that suddenly starts pulling air after working normally for days.

    Hot Water Adds Another System

    An RV water heater sits at the intersection of several systems.

    It needs water.

    Depending on its design, it may use propane, electricity or both.

    It can also require 12-volt electricity for controls.

    Tankless RV water heaters operate differently from conventional tank-style heaters.

    This is a perfect example of why an RV problem can’t always be categorized as just “plumbing” or just “electrical.”

    Several systems can be involved in making one appliance work.

    How a Traditional RV Water Heater Works

    Traditional tank-style RV water heaters store a relatively small quantity of hot water compared with many residential systems.

    Depending on the model, heat may come from a propane burner, an electric heating element or either source.

    Because the tank capacity is limited, owners accustomed to long residential showers can be surprised by how quickly hot water seems to disappear.

    Valve positions can also matter, especially after winterization.

    A bypass valve left in the wrong position can create confusing hot-water symptoms after an RV is put back into service.

    How Tankless RV Water Heaters Are Different

    A tankless unit heats water as it’s needed rather than maintaining a conventional tank of stored hot water.

    That changes the way temperature and flow problems are diagnosed.

    A problem with water flow, burner operation, controls or another required input can affect the resulting water temperature.

    Don’t automatically apply troubleshooting advice for a six-gallon tank heater to a tankless system.

    Where Used Water Goes

    Fresh water is only half of the plumbing story.

    Once you’ve used the water, the RV has to store or discharge the wastewater.

    Most conventional RVs separate wastewater into gray water and black water.

    What the Gray Tank Holds

    The gray tank typically receives wastewater from fixtures such as sinks and showers.

    Exact plumbing arrangements can vary.

    Food residue, soap, grease, hair and other material can enter the gray-water system, which is one reason gray tanks can develop odors of their own.

    A sewage-like smell inside an RV isn’t automatically proof that the black tank is responsible.

    What the Black Tank Holds

    The black tank generally receives waste from the RV toilet.

    Unlike a household toilet connected to a municipal sewer or septic system, the RV toilet usually deposits waste into a holding tank located relatively close below it.

    That changes how the toilet should be used and maintained.

    Water is particularly important.

    Allowing solid waste to accumulate in a tank without enough liquid can contribute to clogs and buildup.

    Why RV Toilets Usually Don’t Work Like Household Toilets

    Many RV toilets use a valve at the bottom of the bowl.

    Opening that valve allows the contents to drop into the black tank.

    The bowl often holds a small amount of water when the valve is closed.

    If the bowl won’t retain water, the sealing mechanism may need attention.

    Because the toilet connects so directly to the holding system, tank ventilation and sealing problems can also become noticeable inside the bathroom.

    RV Holding Tanks Need Ventilation

    Holding tanks are normally vented.

    The venting system helps gases escape appropriately as the tank contents and air volume change.

    A blocked or malfunctioning vent can contribute to odor and drainage symptoms.

    This is another reason pouring stronger chemicals into a tank isn’t necessarily the solution to every odor problem.

    Why Tank Sensors Can Be Misleading

    Many RVs use level sensors to estimate how full their holding tanks are.

    Owners frequently discover that the display doesn’t always agree with reality.

    Residue on sensors or other sensing problems can produce inaccurate readings.

    A black tank showing full immediately after dumping doesn’t necessarily mean the tank is physically full.

    The symptom needs to be interpreted rather than taken at face value.

    How RV Dump Valves Work

    Holding tanks typically have termination valves that are opened when it’s time to empty them through the sewer connection.

    The black and gray systems generally have separate valves.

    Valve condition, tank contents, plumbing layout and blockages can all affect dumping.

    A tank that won’t drain requires a different approach from a monitor that merely says the tank is full.

    Those symptoms shouldn’t be treated as the same problem.

    Why Leaving the Black Tank Valve Open Can Cause Problems

    When connected to a full-hookup campsite, it can be tempting to leave the black-tank valve open continuously.

    The problem is that liquids can leave while solids remain behind.

    Allowing waste and toilet paper to accumulate without sufficient liquid can contribute to serious buildup.

    The black tank works better as a holding tank that contains adequate liquid and is dumped appropriately rather than simply acting as an open sewer pipe.

    How the RV Propane System Works

    Propane is another major energy source in many RVs.

    It can operate equipment such as furnaces, water heaters, refrigerators and cooking appliances, depending on the RV.

    Propane is stored under pressure and supplied through regulators and piping to compatible appliances.

    The regulator reduces supply pressure to the level required by the downstream RV propane system.

    Why One Propane Appliance Working Is an Important Clue

    Suppose your stove lights normally but the furnace doesn’t ignite.

    That tells you something.

    It doesn’t prove every part of the propane system is perfect, but it demonstrates that at least some propane is reaching another appliance.

    If no propane appliance operates, the troubleshooting direction may be broader.

    This is the type of symptom comparison that can save a lot of unnecessary part replacement.

    Propane Appliances May Still Need Electricity

    This point is worth repeating because it confuses so many owners.

    A propane appliance can still depend on electricity.

    The furnace needs electrical power for controls and the blower.

    Many refrigerators need electrical controls.

    Water heaters can require electrical controls and ignition.

    So “I know I have propane” doesn’t eliminate electrical problems.

    What an RV Propane Regulator Does

    Propane stored in a cylinder or tank isn’t simply sent directly to appliances at storage pressure.

    Regulation is necessary.

    Some RVs use automatic-changeover regulator arrangements with multiple cylinders.

    Regulator problems can affect several propane appliances at once, which is why comparing what works and what doesn’t is so useful.

    Treat Propane Odors Seriously

    Propane safety isn’t an area for casual experimentation.

    If you smell propane or suspect a leak, follow the appropriate safety procedures and manufacturer guidance rather than continuing to operate equipment while trying random fixes.

    Repairs involving propane piping, regulators, combustion components and leak testing may require qualified service.

    How an RV Furnace Works

    A typical propane RV furnace combines propane combustion with a 12-volt electrical blower and control system.

    When heat is requested, the furnace has to move through a sequence of events safely.

    Airflow, electrical supply, ignition, propane delivery and safety controls can all matter.

    This is why “the furnace won’t heat” isn’t specific enough for good diagnosis.

    Does the blower run?

    Does it attempt ignition?

    Does it ignite and then shut down?

    Does absolutely nothing happen?

    Each symptom points in a different direction.

    Why an RV Furnace Can Blow Cold Air

    If the blower operates but the burner doesn’t remain lit, you’ll feel air moving without getting the expected heat.

    That doesn’t necessarily mean the blower itself is bad.

    The blower is actually one of the things that is working.

    Troubleshooting should focus on why the heating portion isn’t successfully operating.

    How RV Air Conditioning Works

    Most conventional rooftop RV air conditioners use 120-volt AC electricity.

    The system moves heat from inside the RV to the outside rather than creating “cold” in the literal sense.

    Airflow across the indoor coil is important.

    So are clean filters, appropriate electrical supply and proper operation of the compressor and fan.

    Why an RV AC Can Run Without Cooling

    “Running” can mean several things.

    You may hear the indoor fan while the compressor isn’t operating.

    The compressor and fan may both operate while cooling performance is poor.

    The evaporator may freeze.

    Airflow may be restricted.

    Outside temperature, heat load and the RV’s insulation also influence how well the unit can maintain indoor temperature.

    That’s why good troubleshooting starts with exactly what the air conditioner is doing rather than simply saying it “doesn’t work.”

    RV Air Conditioners Produce Condensation

    As warm, humid interior air passes over a cold evaporator coil, moisture can condense.

    That water needs to go somewhere.

    Depending on the unit and installation, seeing water outside the RV while the AC operates may be completely normal.

    Water dripping inside the RV is a different symptom and deserves investigation.

    Why RV Air Conditioners Can Freeze Up

    Ice on the evaporator can interfere with heat transfer and airflow.

    Restricted airflow is one potential contributor, although diagnosis depends on the equipment and conditions.

    Continuing to operate an iced-up unit without addressing the cause isn’t the same thing as fixing it.

    How an RV Refrigerator Is Different From Your Refrigerator at Home

    RV refrigeration has changed considerably, so you first need to identify what kind of refrigerator you actually have.

    Traditional RV absorption refrigerators can use heat as part of the refrigeration process and may be capable of operating from more than one energy source.

    Other RVs use compressor refrigerators that behave more like familiar residential refrigeration equipment.

    You can’t assume troubleshooting advice for one type applies to another.

    Absorption Refrigerators Can Depend on Multiple Systems

    Depending on the refrigerator, operation can involve propane, AC electricity and DC electrical controls.

    This creates useful diagnostic clues.

    If a refrigerator cools correctly on one energy source but not another, you’ve already narrowed the problem substantially.

    That’s much more informative than simply knowing the refrigerator is warm.

    Leveling Can Matter for Some RV Refrigerators

    Certain absorption refrigerators have installation and operating requirements that should be followed, including manufacturer guidance concerning level operation.

    This is one more example of an RV system interacting with something that initially seems unrelated.

    How the RV is positioned can matter to equipment inside it.

    How RV Slide-Outs Work

    Slide-outs increase interior living space by moving a section of the RV outward when parked.

    The concept is simple.

    The mechanisms are not universal.

    RV slide-outs may use electric motors, gears, rails, cables, hydraulic systems or other arrangements.

    Lippert Schwintek-style systems, rack-and-pinion mechanisms, cable systems and hydraulic slides should not all be diagnosed as though they’re identical.

    The Exact Slide Mechanism Matters

    Suppose a slide won’t retract.

    Before doing anything complicated, identify the system.

    A motor that can be heard running while the room doesn’t move tells you something very different from pressing the switch and hearing absolutely nothing.

    A slide moving crooked is another distinct symptom.

    This is why component identification is such an important part of RV troubleshooting.

    Don’t Force a Slide Because It Won’t Move

    Slide rooms are large, heavy structures.

    Trying to force one past a mechanical problem can make damage worse.

    Emergency or manual retraction procedures also vary by system.

    Use the procedure specified for the equipment actually installed rather than assuming a generic method applies to every RV.

    How RV Awnings Work

    RV awnings range from manually operated designs to powered systems with electric motors and automatic features.

    A powered awning adds another 12-volt electrical load and mechanical system to the camper.

    If it won’t extend or retract, you need to determine whether the issue involves power, controls, the motor, wiring or the physical awning mechanism.

    Weather is also a major consideration.

    An awning creates a large surface exposed to wind and rain. Manufacturer guidance should determine appropriate use rather than assuming an extended awning can handle whatever weather arrives.

    Leveling and Stabilizing Are Not the Same Thing

    These terms are often used interchangeably, but they describe different jobs.

    Leveling changes the RV’s position so the unit sits appropriately level.

    Stabilizing reduces movement after the RV is positioned.

    Stabilizer jacks on many travel trailers are not intended to lift the trailer as though they were heavy-duty leveling jacks.

    Using equipment for a job it wasn’t designed to perform can damage the RV or create an unsafe condition.

    How Automatic Leveling Systems Work

    Larger RVs may have automatic leveling systems using hydraulic or electric jacks.

    The system uses controls and sensors to position the RV.

    Failures can involve electrical supply, sensors, controls, hydraulic components or mechanical issues depending on the system.

    As with slide-outs, identify the leveling-system manufacturer and model before relying on detailed troubleshooting instructions.

    Why an RV Can Still Shake When It’s Level

    Level doesn’t necessarily mean stable.

    A travel trailer can be perfectly level and still move when someone walks across the floor.

    Suspension movement, tire movement, frame length and stabilization all influence how solid the RV feels.

    That’s why leveling and stabilization need to be considered separately.

    The Roof Is One of the Most Important Parts of an RV

    A small water leak can become an expensive problem if it remains unnoticed.

    RV roofs contain multiple openings.

    Depending on the RV, those can include air conditioners, vents, plumbing vents, antennas, skylights and other equipment.

    Every penetration has to remain properly sealed.

    Roof edges, transition areas and adjoining components also need attention.

    RV Roofs Aren’t All Made From the Same Material

    Different RVs use different roofing materials and construction methods.

    Maintenance products that are appropriate for one roof aren’t automatically appropriate for every other roof.

    Before applying a cleaner, coating or sealant, identify the roof material and follow applicable manufacturer instructions.

    Why RV Sealant Needs Inspection

    RVs move.

    They’re exposed to sunlight, temperature changes, rain, snow, road vibration and flexing.

    Sealants and joints can deteriorate.

    Regular inspection gives you a chance to find questionable areas before a tiny opening becomes a hidden leak.

    The correct inspection and maintenance interval depends on the RV and products involved, so manufacturer recommendations matter.

    Where RV Water Leaks Commonly Begin

    The roof gets a lot of attention, but water can enter through many other locations.

    Windows, doors, slide seals, exterior fixtures, roof penetrations, seams and other openings can all be involved.

    The place where water becomes visible inside isn’t necessarily directly beneath the place where it entered.

    Water can travel along framing or other surfaces before showing itself.

    That’s one reason hidden RV leaks can be difficult to trace.

    A Soft RV Floor or Wall Deserves Investigation

    Softness doesn’t automatically prove one specific type of damage, but it isn’t something I’d ignore.

    Water intrusion can damage wood-based materials and other parts of an RV’s structure over time.

    Finding and stopping the source matters just as much as dealing with visible damage.

    Condensation Isn’t Always a Roof Leak

    Water inside an RV doesn’t automatically mean rainwater is entering through the roof.

    Cooking, showering, breathing and other normal activities add moisture to interior air.

    Cold exterior temperatures can allow that moisture to condense on cool surfaces.

    The pattern and circumstances help distinguish condensation from an actual exterior leak.

    RV Tires Require Different Thinking Than Everyday Car Tires

    RV tires may spend long periods sitting still and then suddenly carry substantial loads at highway speeds.

    Age, load, inflation, storage conditions and physical condition all matter.

    A tire can age even when the RV hasn’t accumulated many miles.

    That’s why looking only at tread depth doesn’t tell the whole story.

    Tire Pressure Shouldn’t Be Guessed

    Correct inflation depends on the tire, load and vehicle or RV manufacturer’s requirements.

    The number molded into the tire sidewall isn’t simply a universal instruction to inflate every RV tire to that pressure regardless of circumstances.

    Use the applicable specifications and load information for your setup.

    Learn How to Read a Tire Date Code

    Tires carry manufacturing information that can help determine their age.

    That’s particularly useful when buying a used RV.

    A camper may look nearly new because it was rarely used while still sitting on old tires.

    Age should be considered along with condition and manufacturer guidance when deciding whether tires need replacement.

    Wheel Bearings Matter on Towable RVs

    Many trailer wheel-bearing systems require periodic inspection and service.

    A bearing problem can create heat and potentially lead to serious failure.

    Service procedures and intervals depend on the axle and component manufacturer.

    This is another maintenance area where the actual equipment installed matters more than a universal mileage number copied from somewhere online.

    Trailer Brakes Are a Safety System

    Many travel trailers and fifth wheels use electric brakes controlled through the tow vehicle.

    The brake controller, trailer wiring, breakaway system, connectors, brake assemblies and mechanical adjustment can all influence braking performance.

    Problems involving brakes shouldn’t be approached casually.

    If you’re not qualified to diagnose or repair a braking problem, this is an appropriate place for professional service.

    What a Trailer Brake Controller Does

    The brake controller tells the trailer brakes how much braking effort to apply.

    Modern controllers may use different methods to determine braking output.

    Proper setup matters because too little trailer braking can reduce control while excessive braking can cause harsh operation or wheel lockup.

    Follow the controller, trailer and tow-vehicle instructions for the equipment you’re actually using.

    Why Weight Matters So Much With RVs

    RV weight isn’t merely about whether the engine can pull the trailer.

    Different ratings and actual loaded weights affect tires, axles, suspension, hitch components, braking and vehicle handling.

    Terms you may encounter include GVWR, GAWR, GCWR, cargo-carrying capacity, tongue weight and pin weight.

    These aren’t interchangeable numbers.

    Understanding them becomes especially important when matching a tow vehicle to a trailer.

    Payload Can Become the Limiting Factor

    A truck’s advertised tow rating gets enormous attention.

    Payload and axle ratings can be just as important.

    Passengers, cargo, hitch equipment and the trailer’s tongue or pin weight all add load to the tow vehicle.

    That’s why choosing a tow vehicle based only on a big advertised maximum tow number can be misleading.

    Trailer Sway Shouldn’t Be Treated as Normal

    A trailer may respond to wind and passing vehicles, but significant or persistent sway deserves attention.

    Loading, weight distribution, tire condition, speed, hitch setup and other factors can influence stability.

    Severe sway is a safety issue, not simply an annoying characteristic you should learn to tolerate.

    Motorhomes Have Two Worlds of Systems

    Motorhomes add another layer because the RV itself is also a vehicle.

    You have house systems such as plumbing, appliances and house batteries.

    Then you have chassis systems involving the engine, transmission, steering, suspension, starting system and other automotive equipment.

    Sometimes the two worlds interact.

    For example, a motorhome may have systems that allow the engine’s charging system to contribute to charging the house batteries.

    But the exact configuration varies.

    RV Steps Can Be More Complicated Than They Look

    Motorized RVs and some other campers have powered entry steps.

    Those steps can interact with door switches, ignition state, electrical controls and motors.

    A step that repeatedly extends and retracts may have a different problem from one that never moves or makes any sound.

    Again, exact symptoms matter.

    Doors and Windows Are Part of the Weatherproofing System

    An RV door isn’t just an entrance.

    Its alignment, seals and latching affect weather protection and security.

    Windows similarly combine structural openings, seals and moving components.

    A leaking window may require investigation of the window assembly and its installation rather than simply smearing sealant over whatever area happens to look suspicious.

    RV Safety Detectors Are Easy to Forget

    RVs may contain smoke alarms, carbon-monoxide alarms and propane or combustible-gas detectors depending on the vehicle and equipment.

    These devices shouldn’t be treated as decorative accessories.

    They have finite service lives, power requirements and testing procedures.

    Follow the manufacturer’s replacement and testing instructions.

    Don’t simply disconnect a detector because it repeatedly alarms without first determining why.

    Carbon Monoxide Is Particularly Important Around RVs

    Fuel-burning appliances, engines and generators can produce carbon monoxide.

    Because RVs are relatively small enclosed spaces, appropriate ventilation, appliance condition, generator placement and functioning CO detection are important.

    Never use equipment in a way that allows exhaust gases to accumulate in or around occupied spaces.

    How Campground Hookups Fit Everything Together

    A full-hookup campsite may provide three primary connections:

    Electrical service.

    Fresh water.

    Sewer.

    Those three hookups interact with three major RV systems we’ve already covered.

    The electrical pedestal supplies external AC power.

    The water connection supplies pressurized fresh water.

    The sewer connection gives you a place to empty wastewater.

    Understanding your own RV before connecting everything makes campground setup much easier.

    Check the Electrical Connection Before Assuming It’s Good

    A pedestal existing at your campsite doesn’t guarantee that every part of the electrical connection is correct.

    Appropriate RV electrical protection and testing equipment can help identify certain supply problems, depending on the equipment used.

    Always use equipment according to its instructions and never improvise unsafe adapters or electrical connections.

    Use Potable-Water Equipment for Fresh Water

    Equipment used to supply drinking water to the RV should be suitable for potable-water use.

    Keep fresh-water equipment separate from equipment used around sewer connections.

    It sounds obvious, but establishing separate storage and handling habits makes campsite setup cleaner and easier.

    Sewer Connections Need Care Too

    Secure connections help prevent unpleasant spills.

    Dumping practices should follow campground rules and applicable regulations.

    Black- and gray-water handling also calls for basic hygiene and equipment separation.

    Winterizing Protects the Water System

    In climates where temperatures drop below freezing, water left inside plumbing and components can freeze, expand and cause damage.

    Winterization methods vary according to the RV.

    The process can involve draining water, bypassing certain components, protecting plumbing and following manufacturer-specific procedures.

    Water heaters, filters, pumps, ice makers, washing machines and other equipment can add steps.

    That’s why a generic three-step winterization instruction isn’t appropriate for every camper.

    De-Winterizing Is More Than Flushing Antifreeze

    Putting an RV back into service means restoring systems to their normal configuration.

    That can include changing valve positions, restoring the water-heater configuration, flushing plumbing, reinstalling filters or plugs where appropriate, sanitizing the fresh-water system and checking for leaks.

    A surprising number of springtime “failures” turn out to be something that simply wasn’t returned to its normal operating position.

    Storage Affects More Than Plumbing

    Long-term RV storage also affects batteries, tires, seals, moisture levels, pests and fuel systems where applicable.

    Storage preparation should therefore be treated as its own maintenance process rather than simply parking the camper and walking away.

    Batteries Need Attention During Storage

    Batteries can discharge while an RV sits.

    Parasitic loads may remain even when it appears that everything is turned off.

    Battery chemistry and the storage setup affect the appropriate charging strategy.

    Don’t assume a battery disconnect switch necessarily isolates every possible load in every RV.

    Moisture Control Helps Protect the Interior

    A closed RV can experience substantial temperature and humidity changes.

    Moisture encourages odors, condensation and mold growth.

    Finding and correcting actual leaks is essential, but interior humidity management also matters during storage.

    Mice Can Enter Through Surprisingly Small Openings

    RVs contain plumbing, wiring and mechanical penetrations that can provide possible pest entry points.

    Inspecting and appropriately sealing legitimate openings can reduce the chance of unwanted visitors.

    Be careful not to block required vents, drains, combustion-air openings or other functional components in the process.

    Preventive Maintenance Is What Keeps All These Systems Working

    RV maintenance isn’t one job.

    It’s a collection of smaller inspections and services spread across different systems.

    The roof may need inspection.

    Sealants need attention.

    Tires need pressure and condition checks.

    Wheel and brake components need appropriate service.

    Batteries need monitoring.

    Water systems need sanitation and freeze protection.

    Generators and engines have their own maintenance schedules.

    Appliances have manufacturer-specific requirements.

    The easiest way to stay ahead of this is to build maintenance around the actual equipment installed in your RV rather than following one generic internet checklist.

    Keep the Manuals for Your Components

    One of the smartest things an RV owner can do is build a record of the equipment in the camper.

    Don’t stop with the name printed on the outside of the RV.

    Record the manufacturer and model of major components when possible.

    That might include:

    1. Air conditioner
    2. Furnace
    3. Refrigerator
    4. Water heater
    5. Water pump
    6. Converter or inverter/charger
    7. Solar controller
    8. Generator
    9. Slide system
    10. Leveling system
    11. Awning
    12. Axles
    13. Entry steps
    14. Thermostat

    Save the manuals.

    Take photos of data labels where they’re accessible without unsafe disassembly.

    That information can save an enormous amount of time later.

    The RV Manufacturer Didn’t Necessarily Build What’s Inside Your RV

    This may be the single most useful idea to remember when troubleshooting an RV.

    The name on the outside of the camper often isn’t the name on the component that failed.

    An RV manufacturer assembles a vehicle using components produced by many different suppliers.

    Your refrigerator may come from one company.

    Your furnace may come from another.

    Your slide mechanism may come from another.

    Your converter may come from another.

    Even two RVs from the same manufacturer can contain different components depending on model, floorplan and production period.

    That’s why searching only for something like “Forest River refrigerator problem” may not be enough.

    The refrigerator manufacturer and model can matter much more.

    Model Year Doesn’t Tell You Everything Either

    It’s tempting to assume every camper with the same badge and model year is mechanically identical.

    Production changes and supplier differences can complicate that assumption.

    Whenever detailed troubleshooting depends on the component design, verify the actual component rather than assuming what’s installed based only on the RV’s exterior branding.

    Start Troubleshooting by Identifying What Still Works

    When something goes wrong, most people naturally focus entirely on what stopped working.

    Pay equal attention to what still works.

    That information can be incredibly valuable.

    If the RV refrigerator cools on propane but not electric power, you’ve learned something.

    If every 12-volt light works but the outlets are dead, you’ve learned something.

    If the water pump runs but no faucet gets water, you’ve learned something.

    If one propane appliance works while another doesn’t, you’ve learned something.

    If a slide motor can be heard but the room doesn’t move, you’ve learned something.

    Good troubleshooting is often the process of eliminating what can’t reasonably explain the symptoms.

    Ask What Changed Right Before the Problem Started

    Timing matters.

    Did the problem begin immediately after:

    Winterizing?

    De-winterizing?

    Replacing a battery?

    Connecting to a campground pedestal?

    Running out of propane?

    Moving the RV?

    Retracting a slide?

    A severe storm?

    Long-term storage?

    Performing maintenance?

    Installing new equipment?

    The event immediately preceding the failure may be completely unrelated, but it can also be the strongest clue you have.

    Figure Out Which Energy Source the Component Needs

    Before assuming a component itself has failed, ask what it requires to operate.

    Does it need:

    12-volt DC power?

    120-volt AC power?

    Propane?

    Water flow?

    More than one of those at the same time?

    This is especially useful with RV appliances because many require multiple systems.

    Listen to What the RV Is Telling You

    Sounds are diagnostic information.

    A click is different from silence.

    A motor running is different from a motor humming.

    A furnace blower starting is different from a furnace doing absolutely nothing.

    A water pump running continuously is different from one rapidly cycling.

    Don’t just report that something “isn’t working.”

    Describe exactly what it does.

    Look for Error Codes Before Resetting Everything

    Modern RV equipment may display fault codes or flashing-light patterns.

    Record the code before clearing or resetting it.

    Take a picture if necessary.

    Then identify the exact component model and consult the correct documentation.

    An error code can turn a vague problem into a much narrower diagnostic path.

    Repeatedly resetting equipment without understanding why it faulted can erase useful clues without fixing anything.

    Don’t Start by Replacing Parts

    Parts swapping can get expensive quickly.

    If the furnace doesn’t work, that doesn’t mean you need a furnace.

    If the battery is dead, that doesn’t automatically mean you need a battery.

    If the water pump keeps running, that doesn’t automatically mean the pump has failed.

    First understand what the system is supposed to do.

    Then determine what’s preventing it from doing that.

    Start With the Simple, Safe Checks

    A good diagnostic sequence usually moves from simple and likely toward complicated and invasive.

    Check the obvious operating conditions.

    Confirm required supplies.

    Look at appropriate switches and controls.

    Check accessible protection devices according to manufacturer guidance.

    Observe symptoms.

    Identify the component.

    Consult the correct documentation.

    Only then move toward more involved diagnosis.

    This approach reduces unnecessary disassembly and unnecessary parts replacement.

    Know When a Problem Has Crossed Into Professional Territory

    There’s nothing wrong with understanding how your RV works and handling appropriate owner maintenance.

    There is also nothing wrong with deciding a particular repair shouldn’t be a DIY job.

    High-voltage electrical work, high-current battery systems, propane-system repairs, braking problems, structural damage and some appliance repairs can create significant hazards.

    The right answer isn’t always another troubleshooting step.

    Sometimes the right answer is to stop and have the system inspected by someone qualified to work on it.

    Your RV Makes More Sense Once You See the Systems

    At first, an RV can feel like dozens of unrelated switches, valves, appliances and pieces of equipment crammed into one vehicle.

    It becomes much easier to understand once you stop looking at everything individually.

    The batteries belong to an electrical system.

    The converter connects AC power with the DC side.

    The inverter can make AC power available from stored DC energy.

    The water pump pressurizes water from the onboard tank.

    City water provides an alternative pressurized source.

    The gray and black tanks collect wastewater.

    Propane provides energy for compatible appliances.

    The furnace combines fuel, electricity, airflow and controls.

    The air conditioner depends heavily on AC electricity and airflow.

    Slide-outs and leveling equipment have their own electrical, hydraulic or mechanical systems.

    The roof, windows, doors and seals keep weather outside.

    Tires, brakes, suspension and towing equipment keep the RV safely moving down the road.

    And none of these systems should automatically be assumed to work exactly like the equipment installed in the RV parked next to yours.

    That’s the foundation for understanding an RV.

    Once you know which system you’re dealing with, what component is actually installed and exactly how the symptom differs from normal operation, finding the real problem gets a whole lot easier.

    Written by Evan Mercer

    Evan Mercer writes about RV systems, camper troubleshooting, maintenance and everyday ownership questions for CamperAnswers.com. His work focuses on turning technical information and manufacturer guidance into practical answers ordinary RV owners can actually use.